Getting Started
Set up a professional AI-powered development environment from scratch. You'll get a Linux server, Docker, Cursor IDE connected via SSH, and your first app running — all in under an hour.
What You'll Have When Done
Remote Dev Server
A Linux VM running Docker with /opt/stacks as your permanent app home. Apps keep running even when your laptop is closed.
Cursor IDE (Remote)
Cursor connected to your server via SSH. Full AI coding assistant with access to your remote filesystem and terminal.
AI-Powered Workflow
Cursor rules, agent skills, and the AIBMM planning system pre-configured so your AI assistant follows your project conventions.
First App Running
A Next.js app deployed in Docker, accessible from your browser, with hot-reload and a deployment automation script.
Prerequisites
GitHub Account
VM or bare-metal server
Ability to create a VM and install Ubuntu Server from an ISOWindows or Mac desktop
For running Cursor IDE and connecting via SSHCursor account
Free tier works. Sign up at cursor.comServer Setup
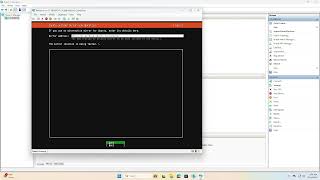
Install Ubuntu Server on a VM and set up Docker with a single command
Download Ubuntu Server ISO
Download the latest Ubuntu Server LTS from the official site. This is the OS that will run on your VM.
Create a VM and install Ubuntu
Create a new VM in your hypervisor (VMware, VirtualBox, Proxmox, Hyper-V, etc.) and boot from the Ubuntu Server ISO. Follow the installer — defaults are fine for most settings.
- Disk: 40GB+ recommended
- RAM: 4GB minimum, 8GB+ recommended
- CPU: 2+ cores
- Network: Bridged adapter (so it gets its own IP on your network)
- OpenSSH: Select “Install OpenSSH server” during setup
Run the one-line setup script
SSH into your new server and run this script. It installs Docker, Docker Compose, adds your user to the docker group, and creates the /opt/stacks directory.
SSH into your server, then run:
curl -s https://raw.githubusercontent.com/CouleeTechlinkInc/tutorial-devsetup/refs/heads/main/setup_level1.sh | bashThe script does the following:
- Installs Docker Engine and Docker Compose plugin
- Adds your user to the
dockergroup (no sudo needed for docker commands) - Creates
/opt/stacksand sets ownership to your user
Generate an SSH key and add it to authorized_keys
On your server, generate an SSH key pair. You'll use this to authenticate from Cursor without a password.
On your server:
ssh-keygen -t ed25519 -C "[email protected]"
# Press Enter to accept defaults

# Add the public key to authorized_keys
cat ~/.ssh/id_ed25519.pub >> ~/.ssh/authorized_keys
chmod 600 ~/.ssh/authorized_keys
Video Walkthrough
Server Setup
Full walkthrough of creating the VM, installing Ubuntu Server, and running the setup script.
Cursor IDE Setup
Connect Cursor IDE to your remote server via SSH for a seamless remote development experience
Sign up and install Cursor
Cursor is an AI-first code editor built on VS Code. Download and install it on your local machine (Windows or Mac).
Download CursorSet up SSH key authentication from your desktop
Generate an SSH key on your local machine and copy the public key to your server.
On Windows (PowerShell):
# Generate SSH key
ssh-keygen -t ed25519

# View your public key
notepad $env:USERPROFILE.sshid_ed25519.pub
On Mac/Linux (Terminal):
# Generate SSH key
ssh-keygen -t ed25519

# View your public key
cat ~/.ssh/id_ed25519.pub
Copy the public key content, then add it to your server:
On your server (paste your public key):
# Paste your public key when prompted
read YOUR_SSH_KEY
echo $YOUR_SSH_KEY >> ~/.ssh/authorized_keys
chmod 600 ~/.ssh/authorized_keysInstall the Remote - SSH extension in Cursor
Open Cursor, go to Extensions (Ctrl+Shift+X), and search for “Remote - SSH”. Install the extension from Microsoft.
Add your server to the SSH config
Open your SSH config file and add your server. Replace YOUR_SERVER_IP with your server's actual IP address.
~/.ssh/config
Host devserver
  HostName YOUR_SERVER_IP
  User YOUR_USERNAME
  IdentityFile ~/.ssh/id_ed25519
  ServerAliveInterval 60
In Cursor: press Ctrl+Shift+P → “Remote-SSH: Open SSH Configuration File” to find and edit this file.
Connect to your server
In Cursor: press Ctrl+Shift+P → “Remote-SSH: Connect to Host” → select devserver. Cursor will install its server component on the remote machine and open a new window connected to your server.
Video Walkthrough

Cursor SSH Setup
Setting up SSH key authentication and connecting Cursor to your remote server.
Build Your First App
Create and run your first app on the server using Docker
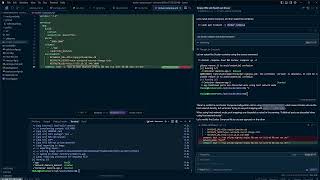
Open a terminal in Cursor (connected to your server)
Press Ctrl+` to open the integrated terminal. You're now running commands directly on your server.
Navigate to /opt/stacks and create your project
cd /opt/stacks
npx create-next-app@latest my-app --typescript --eslint --app --tailwind --src-dir
cd my-appAdd a docker-compose.yml to run it persistently
This lets your app keep running after you close Cursor.
docker-compose.yml
services:
  app:
    build: .
    ports:
      - "3000:3000"
    volumes:
      - .:/app
      - /app/node_modules
      - /app/.next
    environment:
      - NODE_ENV=development
    command: npm run dev
Dockerfile
FROM node:20-alpine
WORKDIR /app
COPY package*.json ./
RUN npm install
COPY . .
EXPOSE 3000
CMD ["npm", "run", "dev"]Start the app
docker compose up -d --build

# Check it's running
docker compose ps

# View logs
docker compose logs -fVideo Walkthrough
First App Setup
Creating your first app, setting up Docker, and getting it running on your server.
AI-Powered Development Workflow
Configure Cursor for AI-assisted development using AIBMM coach patterns
Set up GitHub for your project
Initialize git and push to GitHub. This enables collaboration, version history, and CI/CD.
cd /opt/stacks/my-app
git init
git add .
git commit -m "Initial commit"

# Create a repo on GitHub, then:
git remote add origin [email protected]:YOUR_USERNAME/my-app.git
git push -u origin mainCreate a feature branch before coding
Never code directly on main. Always create a feature branch first.
git checkout -b branch-2026-02-25-initial-setupAdd Cursor rules for your project
Cursor rules teach your AI assistant your project's conventions. Create a .cursor/rules/ directory and add rules files.
mkdir -p .cursor/rules.cursor/rules/coding-guidelines.mdc
# Coding Guidelines

Always work in a feature branch, never on main.
Branch naming: branch-YYYY-MM-DD-description

## Stack
- Next.js App Router with TypeScript
- MUI for UI (no Tailwind)
- TypeORM for database
- Zod for validation

## Patterns
- Use path aliases (@/) not relative imports
- Server Components by default, 'use client' only when needed
- No barrel exports (index files)Point your AI at AIBMM resources
Paste any of these URLs into a Cursor chat to teach your AI the AIBMM workflow:
- https://dev.aibmm.ai/resources
Resource index — start here
- https://dev.aibmm.ai/resources/recursive-ai-tool-loop
How to build a recursive AI tool loop
- https://dev.aibmm.ai/resources/planning
Multi-agent planning system (Architect + Build + Test agents)
- https://dev.aibmm.ai/resources/bob-the-builder
Deployment automation script pattern
Set up Bob the Builder for deployment automation
Bob the Builder is an interactive bash script that handles dev deployment, production releases, pre-flight checks, and testing — all from one menu.
Quick Reference
Common Server Commands
# Check what's running
docker compose ps

# View logs
docker compose logs -f

# Restart app
docker compose restart

# Stop app
docker compose down

# Rebuild and restart
docker compose up -d --build

# Check disk space
df -h

# Check memory
free -h
Git Workflow
# Always start with a feature branch
git checkout -b branch-YYYY-MM-DD-feature

# Check status
git status

# Stage and commit
git add .
git commit -m "feat: add new feature"

# Push branch
git push -u origin HEAD

# Merge to main (after review)
git checkout main
git merge branch-YYYY-MM-DD-feature
git push
SSH Troubleshooting
- Permission denied: Check
chmod 700 ~/.ssh && chmod 600 ~/.ssh/authorized_keys - Connection refused: Verify OpenSSH is running:
sudo systemctl status ssh - Wrong IP: Find your server IP with
ip addr show - Cursor can't connect: Test SSH first:
ssh username@server-ip
Cursor Keyboard Shortcuts
Ctrl+K— Inline AI editCtrl+L— Open AI chat panelCtrl+Shift+P— Command paletteCtrl+`— Toggle terminalCtrl+Shift+`— New terminal@in chat — Reference files, folders, or docs
Next Steps
Now that your environment is set up, explore these resources to level up your AI-powered development workflow: